Showing posts with label photoshop tricks. Show all posts

Tuesday, 19 July 2011

Create An Amazing Diamond Advertisement Poster in Photoshop

Getting Started

Before you start creating a piece it is very important that you fist make some sketches or maybe jot down some ideas, some elements that you have in mind and would like to use in you composition. It is true that the final result may not be the same and may not have the exact shape as you first imagined it but that is the point, you must evolve and expand your idea. This is something that happens to me all the time I start a project.

Final Image Preview

Before you start take a look at the final image you will be creating.
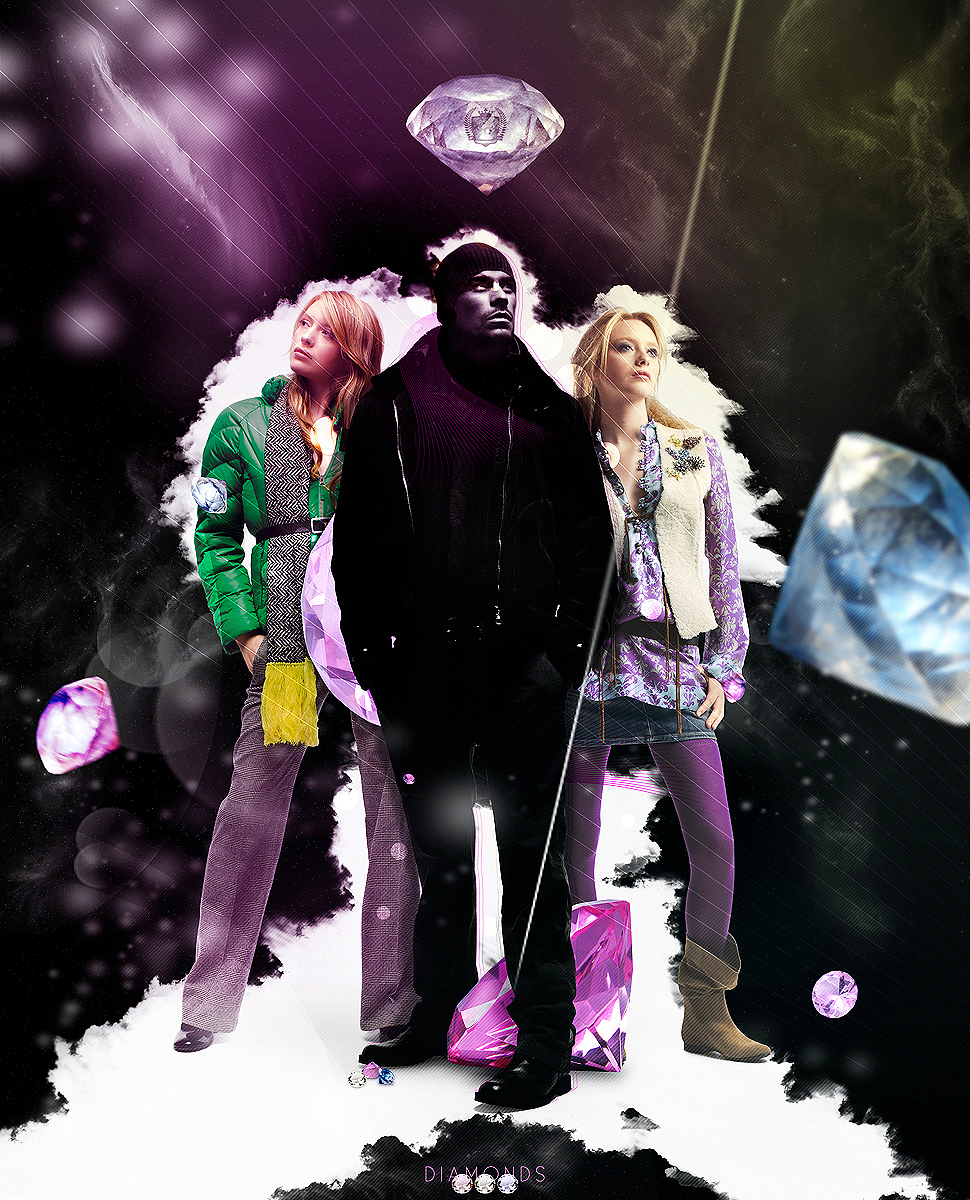
Step 1

First of all you need to start a new document. The size I chose is a very big one as I want this printed later on. Then import the male stock to your document and resize it as you wish. As you can see in the image there is a lot of white that you need to cover with the same grey behind the model.

Step 2

Using the Clone Stamp Tool (S) expand the grey so that it looks like the image below. Also play around with the Levels settings a bit so that you make the model more detailed and a bit darker.

Step 3

Next I will start adding some elements on the composition. Using the Brush Tool (B) with the below settings, draw some white circles.

Step 4

Command + Click on the circles layer, using this selection go to the original model layer and press Command + J. Move the new layer left a few times and set the layer to Overlay.

Step 5

Next step is to import the diamonds into the composition. You can start arranging them but you must keep in mind that you will surly change their order when you add more elements. The first images shows you how I arranged my diamonds.
1. Working on the top diamond: First of all crop the diamond and import it into the document then duplicate the diamond and desaturate it. Set the desaturated layer to 70%. Then I used my logo to make it look like it is frozen into that diamond.
2. The lower diamond between the legs need some shadow and masks applied to it. First of all mask the diamond using the Pen Tool (P). Then create a new layer on top of that and using a sot black brush draw a shadow like below and set the layer to Overlay and Opacity 75%. Duplicate the same layer, set it back to normal but change the Opacity to 45%.
The other diamonds just need some shadows below them and apply motion blur and blur to 3 of them.

Step 6

Using the Pen Tool (P) create a shape around the model. Next you need to lower the Fill to 0% and add a #f424cf stroke of 1 pixel to the shape. Duplicate the shape 2 more times and place them above the model layer. Move the layers into a group and set the group to Multiply.

Step 7

Next using these 2 brush files found on PSDTUTS you need to place 2 of them beside the model.

Step 8

When I first created this illustration I reached this point and realized there is something missing. The elements donÕt get along with the rest of the illustration so I imported 2 more female models.
The difference between these 2 models and the first one is that you need to crop these 2 using the Pen Tool and import them in the document, also you need to place them behind the male model layer.

Step 9

In this step we will make the male model transform into a shadow of some sort. The idea behind this illustration I have made is that “Girls Want Diamonds Not Boys”. This is what we are trying to illustrate here. We have the diamonds very visible but we have to make the boy invisible somehow.
Duplicate the male model layer and desaturate it. Then create a new layer above that and then using a soft black brush, add some more dark. Remember that the brush Opacity needs to be lowered.

Step 10

Duplicate the white and black male model 2 times and place the new layers above the recent layer then set them to Multiply. Set one of them to 43% Opacity.

Step 11

At this point the contrast between the male and background is too high so you need to do something with that. This is the step where you start creating the space background.
First of all create a new layer and place it below all the other layers.

Step 12

Next, create a mask for this layer and using some black cloud brushes that you can find here DeviantArt, you need to start letting in some of the previews background that I also liked very much. This is a really great effect and the result will look very good, like a crack in the space.

Step 13

Next you need to create the stars and nebulas.
First create a new layer above the black one and fill it with black then go to Filter > Render > Noise. Then go to Adjustments > Levels, drag the left slider until stars start disappearing and stop when you are satisfied with the result. In the end mask the start so that they will be visible only on the dark background you created.

Step 14

Import the nebulas created by kire198. What you will do next is to use 2 of those nebulas, desaturate them and place them in position. Then with a soft eraser you need to erase the edges. Set the layer to Exclusion and 20% Opacity.

Step 15

In this step you need to add some elements that I called “Extras”. These are a few blurred white circles and a blurred line. Simple to create but they are very useful.

Step 16

Add more white dots like in step 15 but this time use the Eraser Tool (E) and Overlay setting and place them in the lower left corner. Because you set these white circles to overlay, they will make the nebula more visible and that is exactly what you wanted.

Step 17

Create a new group and call it colors. In this group you will create 4 layers and each layer will have a color. You will need to place all these colors using the Gradient Tool (G) then set each layer to Screen, Color Burn and Soft Light. Follow the images for reference.

Step 18

One more element I will add over all the layers and mask in some places is another line swirl like you added in step 7. This time make it white and set it to Overlay and Opacity 62%.

Conclusion

In the end it is good to save the image as a JPG then add some more details to the image by changing some settings with the Curves. Hope you learned some new techniques and had fun while doing so. You can view the final image below or view a larger version here.

Download the Source PSD

Making Wood Effect

It used to be a lot of work to make realistic-looking wood in Phototoshop, then Photoshop CS came along with its extra fancy filters, especially the one we’re going to use today, the Fibers filter. Now it’s as easy as one, two, three. Just follow this simple tutorial.

As an example, I was asked if I could make a realistic-looking wooden worktop for the following image.


Note that this is not a tutorial about cutting, pasting, etc. It’s about creating simple wood, so I won’t go into much detail about the other stuff.

1.Defining the Colors

Firstly, we need to define the color of the wood and to do this we are going to use the Eye Dropper tool. We want a light brown for the foreground and a dark brown for the background.

In order to make the wood match the original as much as possible, we are going to choose shades from the wood in the source picture.

The red arrows below show where the Eye Dropper tool can choose the colors from. Note that when you click on the Set Foreground Color or Set Background Color boxes (to the left of the red arrows in the diagram below), the Eye Dropper tool will automatically appear. There is no need to choose it from the toolbar.


2.Create a New Layer

Now that we have defined our colors, create a new layer, select all, and fill with the new foreground color.


3.Time to Make the Wood

One thing you should know about the filter we are about to use is that it creates vertical grain lines, and in this particular case, we really want horizontal lines, so first rotate the canvas 90 degrees (Image>Rotate Canvas> 90 degrees CW). Now choose Filter>Render>Fibers.

You will see what looks like wood, though we need to make a few adjustments. As our source picture has quite a close grain, with fairly straight lines, we need to adjust the options accordingly, so slide Variance down to 1.0 and Strength up to 64.0, then click OK. We should end up with something like this.


Now rotate the canvas back 90 CCW.


4. Getting the Perspective Right

All we need to do now is get the perspective right on the wood, so that it doesn’t look like it’s sitting at the wrong angle. To do this, choose Edit>Transform>Distort.
Now grab each of the four corners and place them as follows.


Once we are happy with the basic shape, we need to click on the tick in the top right hand corner.


5.Finishing Off

Now we just need to trim the edges of the worktop, and cut out the sink to place on top. Take your time on the cutting out and you should end up with something like this.


If you find that the colors don’t quite match up, then instead of starting again, try fine tuning with either Image>Adjust>Brightness/Contrast or Image>Adjust>Hue/Saturation.

Wednesday, 13 July 2011

How to Cheat with Visualization in Photoshop

Articles.
How to Cheat with Visualization in Photoshop
Have you ever seen any fruits or vegetables with a face? In this tutorial I’m going to show you how to make realistic view collage with fruit and human face.

In the beginning you should find the picture of ay fruit or vegetable. I prefer to use this one picture of pear. Open up the picture.
How to Cheat with Visualization in Photoshop 01
Then you need to find appropriate picture of human face to put it on the fruit. You can use mine picture or feel free to use your own. Ok, open up the picture and copy it to the first canvas with fruit. Then set up opacity to 45% for this layer and use Edit > Free Transform to reduce the picture and rotate it as on my picture below.
How to Cheat with Visualization in Photoshop 02
Set up opacity to 100% for current layer again and begin cleaning work with Eraser Tool. Use soft round brush with opacity about 30%. Remove all parts, leaving only the eyes, lips and nose.
How to Cheat with Visualization in Photoshop 03
After that select hard round brush and make clear finger area.
How to Cheat with Visualization in Photoshop 04
Press Ctrl+J to duplicate layer and hide the copy (click on the eye, which indicates layer visibility). Go to lower layer and apply Image > Adjustments > Color Balance with next presets:
How to Cheat with Visualization in Photoshop 05
See the result below:
How to Cheat with Visualization in Photoshop 06
After that use Image > Adjustments >Hue/Saturation:
How to Cheat with Visualization in Photoshop 07
The picture should look like this:
How to Cheat with Visualization in Photoshop 08
After that select the Burn Tool (Brush: 70px, Range: Midtones, Exposure: 30%) to make some burn work.
How to Cheat with Visualization in Photoshop 09
Go back to the hidden layer and make it visible again. Select the Eraser Tool again and remove all content, leaving just eyeballs, nostrils and mouth.
How to Cheat with Visualization in Photoshop 10
Then apply Image > Adjustments > Levels to this layer:
How to Cheat with Visualization in Photoshop 11
How to Cheat with Visualization in Photoshop 12
How to Cheat with Visualization in Photoshop 13
See the result below:
How to Cheat with Visualization in Photoshop 14
After that get out the Burn Tool (Brush: 70px, Range: Midtones, Exposure: 30%) again and darken nostrils and mouth areas.
How to Cheat with Visualization in Photoshop 15
Select the Eraser Tool and a soft round brush with 30% opacity and make little clean work on the same areas.
How to Cheat with Visualization in Photoshop 16
Looks good, isn’t it? Ok, move to the next step. We should add the pear texture to the face. Go to the background layer and make selection with Polygonal Lasso Tool as was shown on my picture below.
How to Cheat with Visualization in Photoshop 17
Press Ctrl+J to duplicate selected area on the new layer. After that move this layer above all the layers and change layer mode to Soft Light for it.
How to Cheat with Visualization in Photoshop 18
Then make some brightness and contrast corrections with Image > Adjustments > Brightness/Contrast.
How to Cheat with Visualization in Photoshop 19
Now you should have something like this:
How to Cheat with Visualization in Photoshop 20
After that select the Eraser Tool again and remove clear borders of this texture.
How to Cheat with Visualization in Photoshop 21
Use the Burn Tool (Brush: 40px, Range: Midtones, Exposure: 30%) one more time to make features more clearly.
How to Cheat with Visualization in Photoshop 22
On this step we are done! Hope, this tutorial was useful for you.
How to Cheat with Visualization in Photoshop 23